Click to view bigger
Monday, November 30, 2009
Sunday, November 29, 2009
Monday, November 23, 2009
Sunday, November 22, 2009
Saturday, November 21, 2009
Thursday, November 19, 2009
Wednesday, November 18, 2009
Tuesday, November 17, 2009
Photoshop Workflow for "Firedog"
In this brief explanation, I'll show you an abridged retouching process as it relates to my piece, "Firedog".
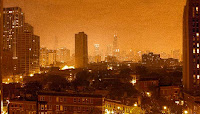
First, I began with a photo of the city that I had taken months prior. I knew I would use it eventually for something, but wasn't sure what. I used Photoshop's Camera RAW to warm the image up, then fine-tuned the color with adjustment layers.
Next, I took a photo of my roommate's dog with gelled lights (to give her an yellow-orange cast on the sides of her face). She looked a bit too innocent, so I disfigured her face slightly in Photoshop's Liquify filter to make her look devilish.
After adjusting contrast with adjustment layers, I decided that there wasn't enough contrast in her face. So a technique I like to use is this: I paint on a gray layer set to "overlay" with either a black or white brush, darkening and lightening areas on her face. Next I clipped the dog out of the black background on which she was photographed, and brought her into the city document window.
Where I got the idea to set the city on fire I have no idea. In any case, I had to find flames. I have a library of photos I use for compositing purposes, so I searched and opened those files, and began placing them throughout the city. This layer of fire to the right was set to "Screen" so that only the lighter colors showed once placed above the city photo.
Voila! The finished piece.
Adam Daniels is an award-winning photographer and retouching artist. Stay tuned to this blog for more brief, and sometimes in-depth tutorials!
Monday, November 16, 2009
HDR with Photomatix, Photoshop

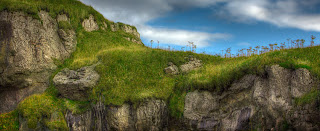
Okay, so HDR has been around for a while now. But I must say, after finally downloading Photomatix and messing around with it, I'm finding that some old, boring photos that I took back in the day look amazing in HDR/pseudo-HDR! This grassy cliff taken in Iceland was a pseudo-HDR, meaning I did not take multiple exposures, but only one. Much like Camera RAW, where one can take the Recovery and Fill Light sliders all the way to the right to get some funky effects, Photomatix does much the same thing but with much more control. After processing it there, I move over to Photoshop to add finishing touches.
A before-&-after image. It's still not in a final stage, but you can see what I started with here. Just a single exposure. Digital processing began in Photomatix, then did a photo-illustration in Photoshop.
I love adjustment layers. They take up minimal space in a Photoshop document, and are non-destructive. When I hit 25-30 layers, or when my computer begins whining for more memory, I'll start merging layers that I'm not working on anymore and save my document to a different file name. I'll still have all the layers if I need to go back and edit, but will free up some RAM by merging most of them down. Make sure you save to a different file name the second you merge layers, or you'll be sorry! A second & third hard drive, one kept off site, are no-brainers as well.
Subscribe to:
Comments (Atom)


