In this brief explanation, I'll show you an abridged retouching process as it relates to my piece, "Firedog".
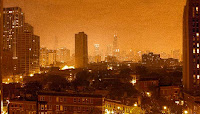
First, I began with a photo of the city that I had taken months prior. I knew I would use it eventually for something, but wasn't sure what. I used Photoshop's Camera RAW to warm the image up, then fine-tuned the color with adjustment layers.
Next, I took a photo of my roommate's dog with gelled lights (to give her an yellow-orange cast on the sides of her face). She looked a bit too innocent, so I disfigured her face slightly in Photoshop's Liquify filter to make her look devilish.
After adjusting contrast with adjustment layers, I decided that there wasn't enough contrast in her face. So a technique I like to use is this: I paint on a gray layer set to "overlay" with either a black or white brush, darkening and lightening areas on her face. Next I clipped the dog out of the black background on which she was photographed, and brought her into the city document window.
Where I got the idea to set the city on fire I have no idea. In any case, I had to find flames. I have a library of photos I use for compositing purposes, so I searched and opened those files, and began placing them throughout the city. This layer of fire to the right was set to "Screen" so that only the lighter colors showed once placed above the city photo.
Voila! The finished piece.
Adam Daniels is an award-winning photographer and retouching artist. Stay tuned to this blog for more brief, and sometimes in-depth tutorials!


Hey, Adam, great posts on the blog and very much in line with info I am looking for to learn some more PS skills. I also just created a blog - still making it look like I want o and will begin posting within a few days.
ReplyDelete